Difference between revisions of "Fr:Manuel:Ordinateur de Navigation"
Greendreamer (talk | contribs) (french translation (continuation)) |
Greendreamer (talk | contribs) m (french translation (continuation)) |
||
| Line 34: | Line 34: | ||
Utiliser l'Ordinateur de Navigation! Grâce à cet outil très puissant, vous pouvez calculer votre voyage dans l'univers de Vega Strike tout en évitant les systèmes dangereux, à moins que vous ne soyez attiré par le côté aventureux de la vie! | Utiliser l'Ordinateur de Navigation! Grâce à cet outil très puissant, vous pouvez calculer votre voyage dans l'univers de Vega Strike tout en évitant les systèmes dangereux, à moins que vous ne soyez attiré par le côté aventureux de la vie! | ||
| − | L'ordinateur de Navigation fournit deux | + | L'ordinateur de Navigation fournit deux fonctions avancées. '''List Mode''' (mode "liste") vous permettra d'ajouter, renommer et supprimer des chemins, et de les rendre visibles ou non. '''Edit Mode''' (mode "édition") vous permet de modifier les détails de chemins déjà créés. Notez que tous les nouveaux chemins devront être édités avant de devenir utilisables. |
On accède à l'ordinateur de Navigation en vol, via [[Fr:Manuel:Carte|l'écran des cartes]]. Activez [[Fr:Manuel:Carte|l'écran des cartes]] en pressant les touches {{Key:EN:Shift left}} et {{Key:EN:M}}, puis sélectionnez le bouton '''[Nav Comp]'''. | On accède à l'ordinateur de Navigation en vol, via [[Fr:Manuel:Carte|l'écran des cartes]]. Activez [[Fr:Manuel:Carte|l'écran des cartes]] en pressant les touches {{Key:EN:Shift left}} et {{Key:EN:M}}, puis sélectionnez le bouton '''[Nav Comp]'''. | ||
| Line 68: | Line 68: | ||
Le nœud que vous créez apparaît dans la boîte en bas à droite. Vous pouvez construire trois types de nœuds différents: | Le nœud que vous créez apparaît dans la boîte en bas à droite. Vous pouvez construire trois types de nœuds différents: | ||
| − | === | + | === Ajouter un nœud "Système" === |
<table style="float:right;"><tr><td>[http://forums.vega-strike.org/cpg/wiki_manual/flightcomp_nav_edit_system.png http://forums.vega-strike.org/cpg/albums/wiki_manual/thumb_flightcomp_nav_edit_system.png] | <table style="float:right;"><tr><td>[http://forums.vega-strike.org/cpg/wiki_manual/flightcomp_nav_edit_system.png http://forums.vega-strike.org/cpg/albums/wiki_manual/thumb_flightcomp_nav_edit_system.png] | ||
</td></tr></table> | </td></tr></table> | ||
| − | + | Ces nœuds correspondent directement à des systèmes spécifiques. Pressez le bouton '''[Current]''' pour utiliser le système courant (le système courant représente toujours celui où votre vaisseau se trouve). Le système cible représente n'importe-quel système que vous avez ciblé dans la carte des secteurs. La dernière option se réfère toujours au système nommé dans le bouton. Vous pouvez changer ce système en sélectionnant un système différent sur la carte. Sur cette dernière, le système dans lequel vous vous situez est représentée entourée d'une boite rouge, alors que le système ciblé est dans une boite jaune, et le système sélectionné dans une verte. | |
| − | {{Fixme}} '' | + | {{Fixme}} ''Il faudrait de petits boutons pour ça. Voir [[VsWiki:Templates#Interface_buttons]]'' |
| − | === | + | === Ajouter un nœud de critères === |
<table style="float:right;"><tr><td>[http://forums.vega-strike.org/cpg/wiki_manual/flightcomp_nav_edit_criteria.png http://forums.vega-strike.org/cpg/albums/wiki_manual/thumb_flightcomp_nav_edit_criteria.png] | <table style="float:right;"><tr><td>[http://forums.vega-strike.org/cpg/wiki_manual/flightcomp_nav_edit_criteria.png http://forums.vega-strike.org/cpg/albums/wiki_manual/thumb_flightcomp_nav_edit_criteria.png] | ||
</td></tr></table> | </td></tr></table> | ||
| Line 82: | Line 82: | ||
Two commands add additional criteria: '''[AND]''' and '''[OR]'''. Select your new criteria type and enter the value. Then select your pre-existing criteria, and press the appropriate function. You may also exclude criteria by selecting a pre-existing criteria and pressing '''[NOT]'''. This method allows you to select a destination as follows: '''CONTAINS (Refinery) AND NOT OWNEDBY (Nasty Evil Faction)'''. There's a lot of potential in these types of nodes. Note: Since these nodes do not refer to a specific system, they cannot be applied as source nodes. | Two commands add additional criteria: '''[AND]''' and '''[OR]'''. Select your new criteria type and enter the value. Then select your pre-existing criteria, and press the appropriate function. You may also exclude criteria by selecting a pre-existing criteria and pressing '''[NOT]'''. This method allows you to select a destination as follows: '''CONTAINS (Refinery) AND NOT OWNEDBY (Nasty Evil Faction)'''. There's a lot of potential in these types of nodes. Note: Since these nodes do not refer to a specific system, they cannot be applied as source nodes. | ||
| − | {{Fixme}} '' | + | {{Fixme}} ''Il faudrait de petits boutons pour ça. Voir [[VsWiki:Templates#Interface_buttons]]'' |
=== Adding a Chain Node === | === Adding a Chain Node === | ||
| Line 93: | Line 93: | ||
The second exception with applying nodes to paths is that the Navigation Computer checks Chain Nodes to ensure there are no cycles before applying a node. By way of example, you cannot create the following: Path A refers to Path B, which refers to Path C, which refers back to Path A; this would imply a cycle. If a cycle would be created, the navigation computer will simply refuse to apply the node to the path. | The second exception with applying nodes to paths is that the Navigation Computer checks Chain Nodes to ensure there are no cycles before applying a node. By way of example, you cannot create the following: Path A refers to Path B, which refers to Path C, which refers back to Path A; this would imply a cycle. If a cycle would be created, the navigation computer will simply refuse to apply the node to the path. | ||
| − | {{Fixme}} '' | + | {{Fixme}} ''Il faudrait de petits boutons pour ça. Voir [[VsWiki:Templates#Interface_buttons]]'' |
==Displaying Your Calculated Paths== | ==Displaying Your Calculated Paths== | ||
| Line 105: | Line 105: | ||
* Return to the in-flight [[Manual:Map|Map Screen]] and ensure that the map is in ''Sector'' Mode. Clicking on the '''[Path]''' button will toggle the visibility of the selected navigation path on and off. The selected path will be displayed in red. | * Return to the in-flight [[Manual:Map|Map Screen]] and ensure that the map is in ''Sector'' Mode. Clicking on the '''[Path]''' button will toggle the visibility of the selected navigation path on and off. The selected path will be displayed in red. | ||
| − | {{Fixme}} '' | + | {{Fixme}} ''Il faudrait de petits boutons pour ça. Voir [[VsWiki:Templates#Interface_buttons]]'' |
=See also= | =See also= | ||
Revision as of 13:39, 17 April 2013
Ce site dans d'autres langues: Deutsch – English – Français – Español – Polski – Italiano – Nederlands – Руccкий – 简体中文
| Communication |
Contents
Carte interstellaire

|
Utilisez le bouton [Up] pour voir la carte des secteurs.
Utilisez le bouton [Down] pour voir la carte du système.
Utilisez la roulette de la souris pour zoomer et dé-zoomer.
Cliquez et déplacez pour bouger la carte.
INFO
|
L'écran d'information est activé par le bouton [Nav/Info], puis la sélection de [Mission].
Sur le côté gauche est affichée une liste de toutes les factions avec leurs couleurs, et votre relation actuelle avec elles.
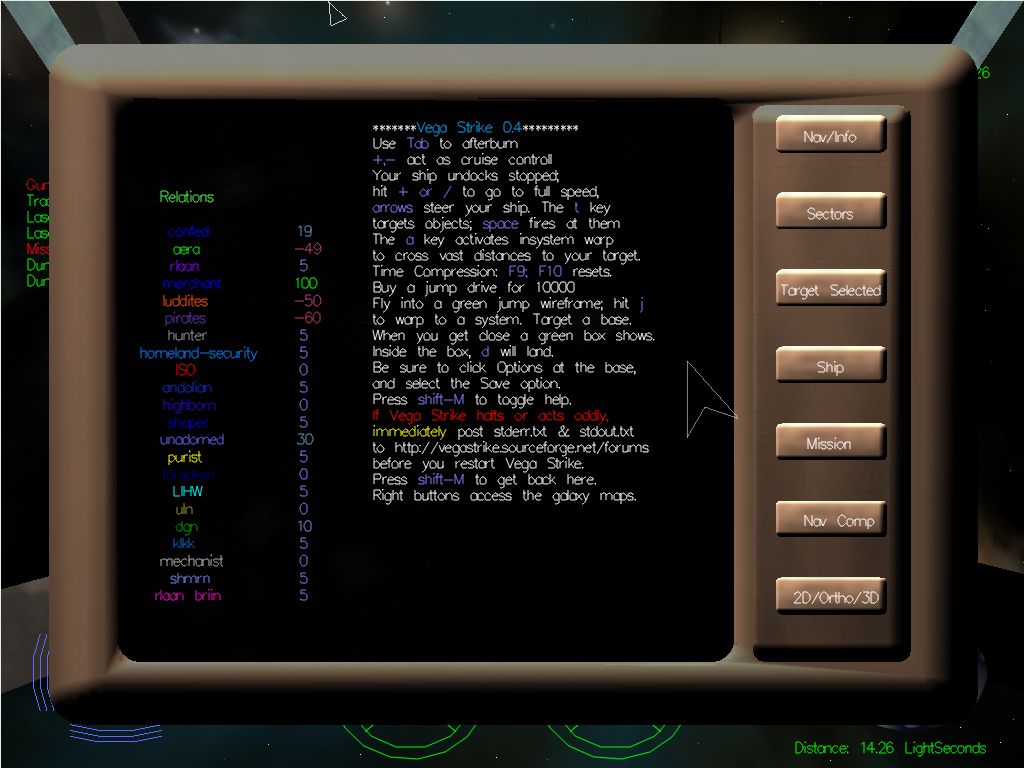
ORDINATEUR DE NAVIGATION

|
Vous voulez donc aller au système xxxxx depuis le yyyyy en effectuant le plus petit nombre possible de sauts. Peut-être aimeriez-vous éviter tout système Aeran, et visiter sur la route une Planète Océanique. Comment faire cela?
Utiliser l'Ordinateur de Navigation! Grâce à cet outil très puissant, vous pouvez calculer votre voyage dans l'univers de Vega Strike tout en évitant les systèmes dangereux, à moins que vous ne soyez attiré par le côté aventureux de la vie!
L'ordinateur de Navigation fournit deux fonctions avancées. List Mode (mode "liste") vous permettra d'ajouter, renommer et supprimer des chemins, et de les rendre visibles ou non. Edit Mode (mode "édition") vous permet de modifier les détails de chemins déjà créés. Notez que tous les nouveaux chemins devront être édités avant de devenir utilisables.
On accède à l'ordinateur de Navigation en vol, via l'écran des cartes. Activez l'écran des cartes en pressant les touches  et
et  , puis sélectionnez le bouton [Nav Comp].
FIXME Il faudrait de petits boutons pour ça. Voir VsWiki:Templates#Interface_buttons
Mode Liste

|
Le mode "liste" vous permet d'ajouter, renommer et supprimer des chemins, ainsi que de les rendre visibles ou non.
- [Add] Ajoute un nouveau chemin qui pourra être édité.
- [Edit] Permet d'accéder au mode "édition" pour modifier le chemin sélectionné.
- [Show] Affiche le chemin sélectionné dans la carte des secteurs.
- [Show All] Affiche tous les chemins listés dans la carte des secteurs.
- [Show None] N'affiche aucun chemin dans le carte des secteurs.
- [Rename] Renomme le chemin sélectionné (saisir un nouveau nom).
- [Remove] Supprime le chemin sélectionné de la liste.
- Up/Down = Fait défiler les chemins listés (ED: actuellement désactivé).
- Left Box = Liste des chemins existants.
- Right Box = Informations concernant le chemin actuellement sélectionné, comme la visibilité, et les systèmes "source" et "destination".
FIXME Il faudrait de petits boutons pour ça. Voir VsWiki:Templates#Interface_buttons
Mode "Edition

|
Un nœud "source" et un nœud "destination" définissent chaque chemin créé par l'utilisateur. (Note: une autre façon de se représenter des nœuds est les points; tout voyage a un point de départ et un point d'arrivée). Dans la plupart des cas, le nœud "source" par défaut (votre système courant) devrait être suffisant, mais des recherches plus complexes avec des points de départs variables sont possibles. Notez la boîte en bas à droite. Elle contient le nœud que vous être en train de construire. Quand vous avez fini de construire le nœud (en bas), vous pouvez l'appliquer au chemin, comme un nœud "source" en pressant le bouton [Source], ou comme un nœud "destination" en pressant le bouton [Destination] – avec deux exceptions présentées ci-dessous.
Le nœud que vous créez apparaît dans la boîte en bas à droite. Vous pouvez construire trois types de nœuds différents:
Ajouter un nœud "Système"

|
Ces nœuds correspondent directement à des systèmes spécifiques. Pressez le bouton [Current] pour utiliser le système courant (le système courant représente toujours celui où votre vaisseau se trouve). Le système cible représente n'importe-quel système que vous avez ciblé dans la carte des secteurs. La dernière option se réfère toujours au système nommé dans le bouton. Vous pouvez changer ce système en sélectionnant un système différent sur la carte. Sur cette dernière, le système dans lequel vous vous situez est représentée entourée d'une boite rouge, alors que le système ciblé est dans une boite jaune, et le système sélectionné dans une verte.
FIXME Il faudrait de petits boutons pour ça. Voir VsWiki:Templates#Interface_buttons
Ajouter un nœud de critères

|
These nodes do not refer to a specific system, but rather they will match up to any system meeting a certain criteria. The different criteria types are [Owned By], [Contains] and [Sector]. To add a criterion to the list, simply select a criteria type and then type in a value in the box. For example, if the node should match systems with a Refinery, select [Contains] and type Refinery in the box. Press [AND] to add it to the list. Remove criteria by highlighting and pressing the [Remove] button.
Two commands add additional criteria: [AND] and [OR]. Select your new criteria type and enter the value. Then select your pre-existing criteria, and press the appropriate function. You may also exclude criteria by selecting a pre-existing criteria and pressing [NOT]. This method allows you to select a destination as follows: CONTAINS (Refinery) AND NOT OWNEDBY (Nasty Evil Faction). There's a lot of potential in these types of nodes. Note: Since these nodes do not refer to a specific system, they cannot be applied as source nodes.
FIXME Il faudrait de petits boutons pour ça. Voir VsWiki:Templates#Interface_buttons
Adding a Chain Node

|
These nodes refer to the solutions of other path searches. This is best explained through example: you have one search path (GreatSearch) - which takes you from system A to system B, but you then want to continue the path to system C. Chaining will create the route from A to B to C. This is done by using the destination of the first search as the starting point of the second search. First create and highlight your original path (GreatSearch), then select whether you want to copy the point from [Source], [Destination] or [All Points]. In this case you would select [Destination]. Then press [Chain] to create the node.
The [All Points] option might seem confusing at first, but imagine you have an existing route named (GoodPath), going from A to B. You also need to stop at an agricultural planet along the way. Create a new path (NewPath) and make the source node a Chain Node by selecting (GoodPath) and [All Points] option, clicking [Chain] to create the chain, and then [Source] to apply it to (NewPath). Then use a regular Criteria Node to supply the destination. Now you have a second path that represents the route to the closest agricultural planet along the way. It is similar to finding the closest hotel from the highway when you are planning a long road trip.
The second exception with applying nodes to paths is that the Navigation Computer checks Chain Nodes to ensure there are no cycles before applying a node. By way of example, you cannot create the following: Path A refers to Path B, which refers to Path C, which refers back to Path A; this would imply a cycle. If a cycle would be created, the navigation computer will simply refuse to apply the node to the path.
FIXME Il faudrait de petits boutons pour ça. Voir VsWiki:Templates#Interface_buttons
Displaying Your Calculated Paths

|
So you've created a really great trip path. How do you follow it? Unlike accepted missions which display the flight path in the HUD, the trip paths are displayed through the in-flight Map Screen.
For the created navigation path to be displayed in the in-flight Map Screen, the path must be selected as visible in the Navigation Computer. To make a path visible:
- Activate the Navigation Computer. Open the Map screen by pressing and then select the [Nav Comp] button.
- In List Mode, highlight the required path and push the [Show] button. To show all created paths, push the [Show All] button.
- Return to the in-flight Map Screen and ensure that the map is in Sector Mode. Clicking on the [Path] button will toggle the visibility of the selected navigation path on and off. The selected path will be displayed in red.
FIXME Il faudrait de petits boutons pour ça. Voir VsWiki:Templates#Interface_buttons
See also
| Communication |